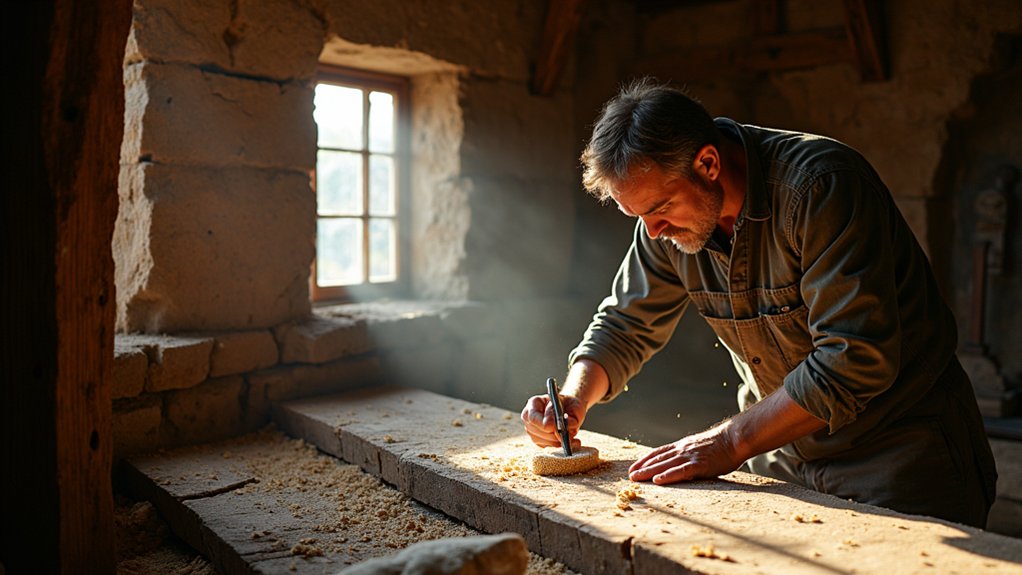
Repairing and refinishing original timber beams in a period property starts with restraint. You’ll need to inspect for decay, movement, insect damage, and harmful alterations before cleaning or filling anything. Address moisture at its source, use compatible reversible materials, and preserve tool marks and patina wherever possible. A breathable, low-sheen finish can protect the timber without making it look new—but knowing when a beam needs structural attention is the first vital decision.
Key Takeaways
- Inspect beams thoroughly for decay, insect activity, moisture, splits, sagging, and weakened bearings before beginning repairs.
- Photograph and record historic tool marks, finishes, dimensions, alterations, and damage before cleaning or removing material.
- Address leaks, damp, and ventilation problems first, allowing timber to dry gradually without rapid heating.
- Repair stable cracks and missing areas with compatible, reversible timber or lime-based materials, avoiding rigid cement and polyester.
- Refinish gently with breathable, low-sheen waxes or compatible oils, testing products first and applying thin coats.
Inspect Timber Beams for Damage and Decay
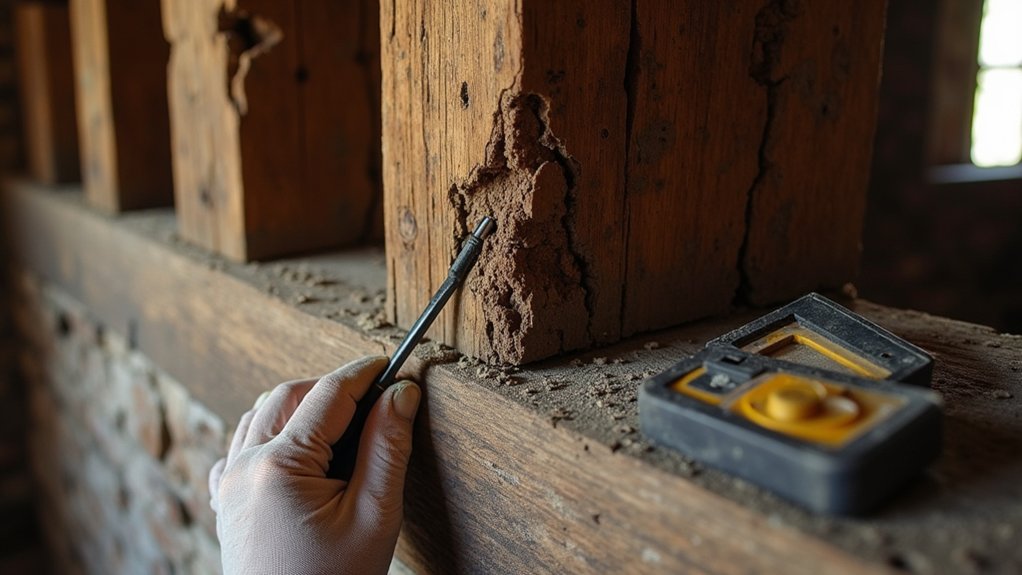
Before you strip, sand, or refinish an original beam, inspect it carefully to establish its condition and construction. Use a torch and mirror to examine every face, joint, end grain, and bearing area. Look for soft spots, splits, fungal staining, insect holes, fresh frass, moisture marks, and failed coatings.
Probe suspicious areas gently with an awl, recording the depth and location of decay rather than enlarging the damage. Check for twisting, sagging, or movement, but limit your assessment to visible condition at this stage.
Study the woodgrain patterns, tool marks, adze cuts, pegs, and naturally uneven surfaces; these features can reveal historic workmanship and support Historic authenticity. Photograph details, measure dimensions, and note alterations, stains, and previous repairs before cleaning or removing any material.
Check When Repairs Need a Structural Expert
If an original beam shows significant sagging, twisting, deep decay, large splits, or movement at a joint or bearing, you’ll need a structural engineer or conservation specialist to assess it before any repair begins.
You should also seek expert advice when a beam supports floors, roofs, masonry, or altered openings, particularly if damage affects its bearing length.
Don’t remove, notch, jack, or sister the timber without a designed sequence; an apparently minor intervention can redistribute loads or disturb historic fabric.
Ask your consultant to identify the cause, specify temporary propping, and distinguish essential strengthening from cosmetic work.
They can recommend compatible Modern materials while protecting the beam’s character and fabric.
This measured approach supports Historical preservation, meets safety requirements, and helps you document decisions for future maintenance.
Clean Original Timber Beams Safely
Once any structural concerns have been addressed, clean the original timber gently to preserve its patina, tool marks, and surviving finishes. Start by vacuuming with a soft brush attachment, working along the grain and lifting dust from joints without forcing debris into gaps. Test every method on an inconspicuous area first.
For light grime, use a barely damp, lint-free cloth and clean water; don’t saturate the wood, as trapped moisture can encourage decay. Avoid bleach, strong detergents, abrasive pads, and aggressive sanding, which can erase historic evidence.
Choose Eco friendly cleaning products only when their ingredients are compatible with the timber and existing coating. Record what you find before removing anything, supporting Historical accuracy.
If soot or paint residue persists, consult a conservator rather than guessing. Let the beam dry naturally and ventilate the room.
Repair Cracks, Splits, and Missing Timber
Assess cracks, splits, and missing timber carefully, as damage may indicate movement or structural weakness rather than surface age.
You shouldn’t remove sound historic wood; instead, seek a structural assessment where defects are deep, spreading, or near supports.
Fill stable cracks and splits with a compatible, reversible repair material that respects the beam’s character.
Assess Structural Timber Damage
Before repairing an original timber beam, establish whether its damage is cosmetic or structural. Inspect both faces, ends, bearing points, and concealed junctions for movement, sagging, crushing, twisting, or separation from supporting walls.
Probe suspect areas gently with an awl; soft, crumbly wood may indicate decay, while fresh frass, holes, or galleries suggest active insects.
Map cracks and splits, noting their width, direction, length, and whether they continue through the section.
Check surrounding masonry for settlement or moisture that could be causing movement.
Don’t remove sound material or load-bearing fragments until a structural engineer or experienced conservation professional has assessed the beam.
Record photographs and measurements, and consider the building’s Historical context before selecting Preservation techniques.
If stability is uncertain, shore the area and keep people clear until advice arrives.
Fill Cracks and Splits
After the beam’s structure is confirmed sound and dry, clean cracks and splits with a soft brush and remove only loose, friable fibres. Don’t widen sound timber or chase defects into the beam.
For narrow gaps, press in a compatible, reversible conservation filler, coloured to harmonise with the surrounding wood. Use lime-based or specialist timber repair materials where appropriate, rather than rigid cement or polyester compounds that trap moisture and move differently from the beam.
Pack deeper voids in stages, allowing each layer to cure, and reinforce substantial losses with carefully fitted matching timber.
Retain tool marks, irregular edges, and evidence of handwork. If the beam includes Decorative carving, protect it and avoid filling its crisp details.
Its Historical significance should guide every repair: stabilise, don’t over-restore, and document all materials used.
Treat Damp, Insects, and Timber Decay
Treat the cause before repairing the timber: fix leaking roofs, defective gutters, plumbing faults, or rising damp, and improve ventilation where necessary. Moisture prevention protects historic beams more effectively than surface treatment alone.
Let damp timber dry gradually, avoiding heaters that can cause rapid shrinkage and further splitting.
Check for beetle holes, frass, softened fibres, and fungal growth; probe cautiously with a screwdriver and record affected areas. Arrange a survey by a conservation specialist if decay extends into structural sections, or if you find active infestation.
Use insect control products only when evidence confirms live pests, and follow the label carefully.
Replace lost timber with matching, compatible species and traditional joinery where possible. Don’t seal damp or infested wood behind new coatings.
Monitor humidity, leaks, and fresh bore dust regularly.
Remove Old Paint and Dark Finishes Carefully
Assess whether the existing paint or dark finish has historic value before removing it. Test a small, concealed area, then use gentle methods such as careful scraping or a suitable poultice rather than aggressive sanding or heat.
You’ll protect the beam’s character while revealing the timber safely.
Assess Existing Finishes
Before you reach for a scraper or solvent, identify what’s already on the beam and why it may be there. Examine its colour, sheen, texture, and thickness in good light. Look for brush marks, layered coatings, limewash, tar, wax, or soot, and note whether finishes differ between exposed and sheltered faces.
Historic paint may conceal tool marks, repairs, insect damage, or earlier alterations, so don’t assume the bare timber is the original appearance. Decorative finishes can also provide evidence of a room’s former use or status.
Photograph each elevation and record your observations before disturbing anything. Check nearby beams, ceilings, and joinery for comparable treatments.
If the coating appears historically significant, or its composition remains uncertain, consult a conservation professional and consider testing for hazardous substances before planning removal.
Use Gentle Removal Methods
Start with the least aggressive method that can remove the finish: gently lift loose paint with a sharp scraper held nearly flat, then use a soft brush and vacuum to clear dust from the grain. Work along the timber, not across its fibres, and stop when sound, firmly bonded coating remains.
For stubborn areas, try a reversible poultice or a manufacturer-approved, low-toxicity stripper on a hidden patch first.
Keep moisture to a minimum, because saturated beams may swell, split, or encourage decay.
Avoid sanding discs, wire brushes, heat guns, and abrasive blasting; these can erase tool marks, soften arrises, and destroy evidence of historic craftsmanship.
Wear suitable respiratory and skin protection, and contain flakes safely.
This gentle removal approach, paired with delicate cleaning, preserves character while preparing the beam for compatible repairs and finishes.
Choose the Right Finish for Period Beams
Choose a finish that protects the timber while preserving the beam’s age, grain, and character. For Historical authenticity, consider a breathable, low-sheen treatment such as natural wax, limewash, or a compatible oil, depending on the wood’s condition and the building’s traditions.
These finishes allow moisture to move through the timber and avoid creating a glossy, modern appearance. Test your chosen product on an inconspicuous area first, because colour and absorption vary between species, repairs, and exposed surfaces.
Modern finishes can offer stronger stain resistance, but some seal the grain, trap moisture, or prove difficult to remove later. Check the manufacturer’s compatibility guidance and select a product suitable for historic timber.
If the beam sits near heat, damp, or handling, choose durability without sacrificing breathability or visual restraint.
Refinish Timber Beams Without Losing Character
Once the surface is clean, dry, and sound, apply the finish in thin, even coats that follow the beam’s grain. Test your chosen product first on an inconspicuous area, because historic timber can absorb colour unevenly.
For Decorative staining, choose a restrained, breathable stain that complements the existing wood rather than masking its age, tool marks, and natural variation. Wipe away excess promptly and build colour gradually; you can’t easily reverse an overly dark coat.
Allow each layer to dry fully, then lightly abrade only where the manufacturer recommends. Modern sealing can protect vulnerable beams, but avoid thick, glossy films that look out of place and trap moisture.
Prefer a compatible, low-sheen finish, and leave sound, characterful areas minimally treated. Always follow the product guidance and conservation requirements.
Conclusion
With patience, you can restore period beams without erasing their story. Inspect damage carefully, resolve damp and insect problems, and call a structural specialist when safety is uncertain. Clean gently, repair losses with compatible materials, and remove finishes only when necessary. Then apply a breathable, low-sheen coating that lets the timber’s grain, tool marks, and aged colour remain visible. Done thoughtfully, your beams will stand like quiet witnesses, carrying historic character into the future.
About the Author